If you love hiking and nature, then hiking photography is the perfect hobby for you! It combines two of your passions into one creative outlet. And, it allows you to capture the beauty of the outdoors and share it with others.
Hiking photography can be challenging, but that’s part of the fun. And you don’t quite need a bunch of expensive gear. Of course, you can buy all the fancy stuff if you like, but your iPhone could work just fine.
How do you take pictures hiking?
Get Close To Your Subject:
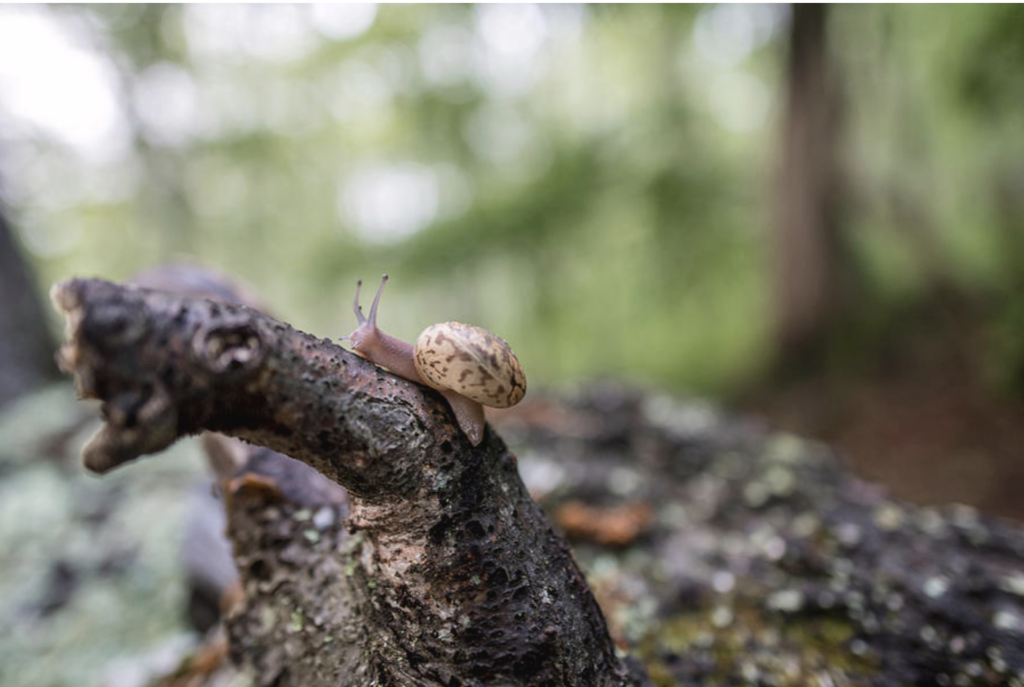
When you’re hiking, you’ll likely come across all sorts of beautiful things – flowers, leaves, rocks, etc. So get in close and take a photo that really captures the details. These all help paint a picture of your experience. Especially when combined with other photos on your Instagram carousel or Facebook Gallery.
Or Don’t Get Close To Your Subject:
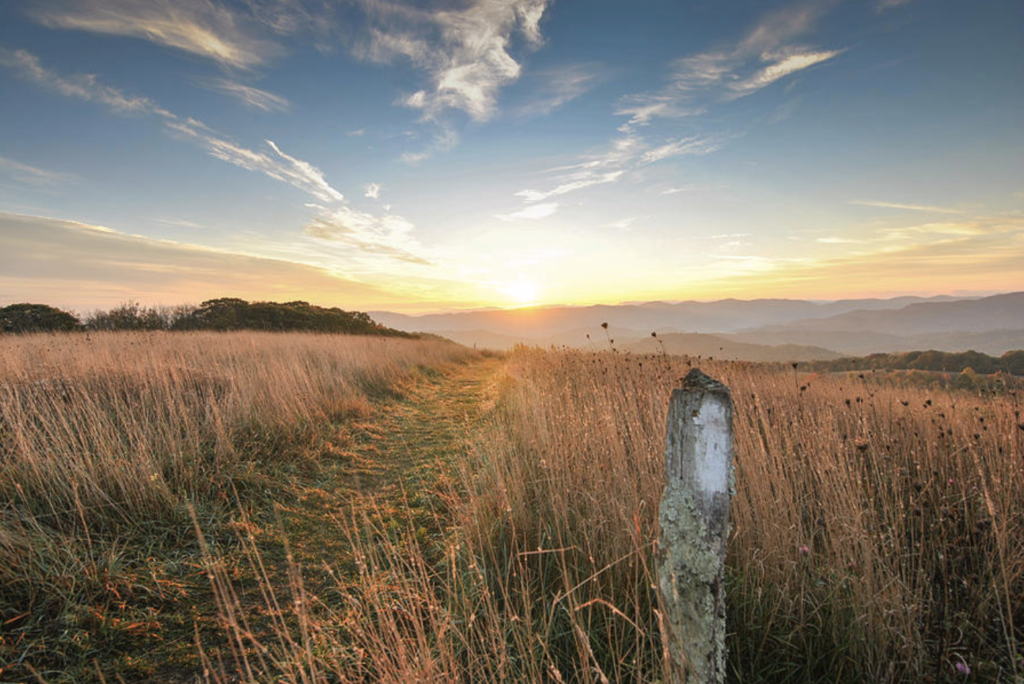
Sometimes it is best to show the entire scene in your image. Use the rule of thirds to help compose your images. Maybe place the trail in the center of the image, or in a way that leads the viewer’s eyes to the beauty of that specific hike.
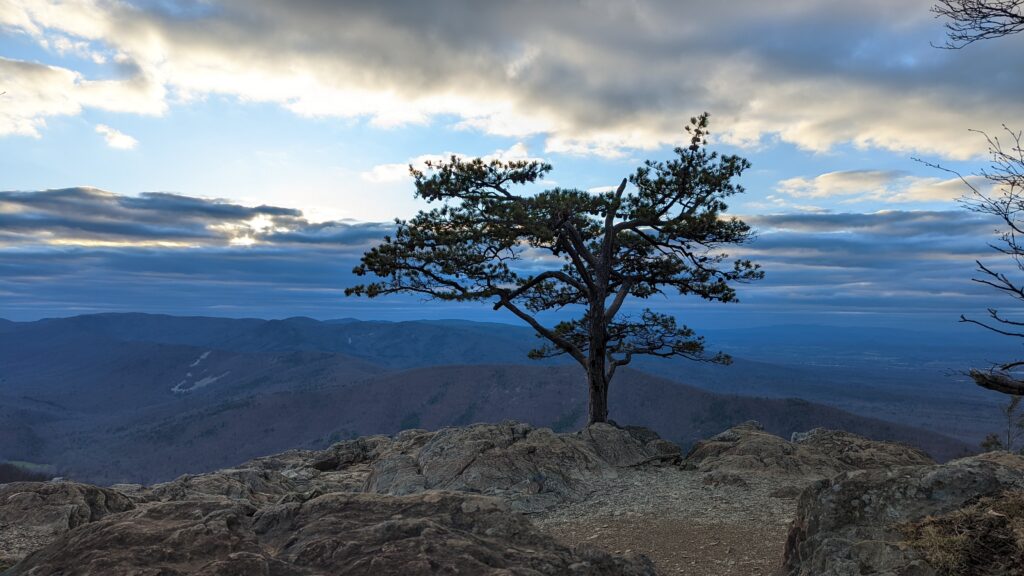
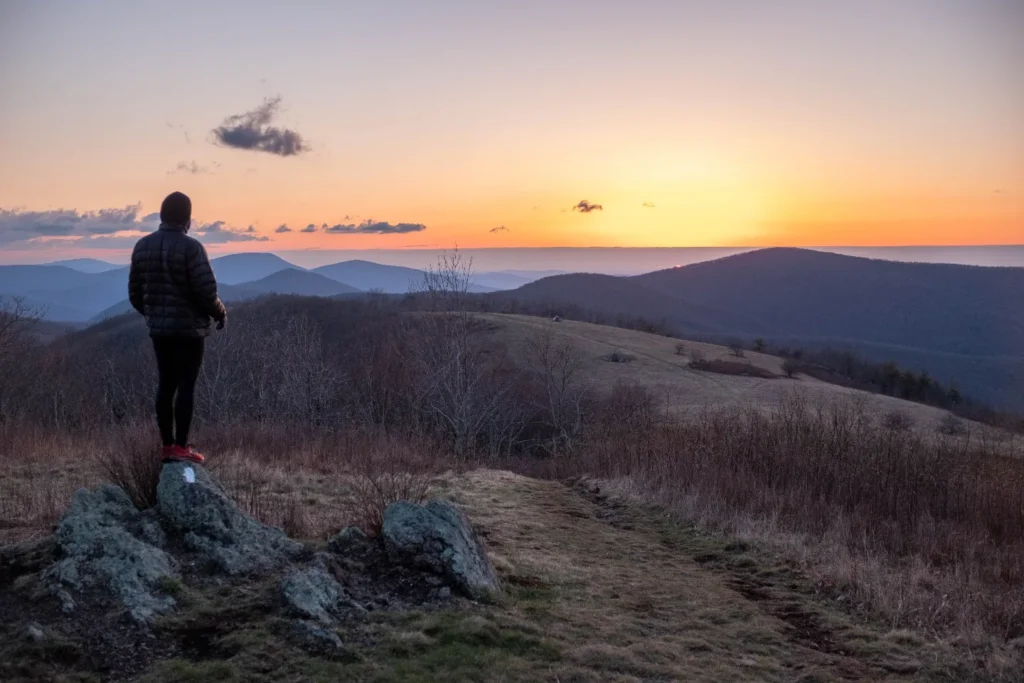
This can also be the case when capturing a majestic mountain off in the distance. Don’t just point at the mountain and shoot. Try to include various other subjects to help tell a story. For this image below, I was sure to include the Appalachian Trail, one of its markers, the sun rising, and mountains off in the distance. That was an awesome morning!
Use Natural Light
The best light is often early in the morning or later in the evening. Mid-day sun can often be too harsh for many cameras. If you have no other choice, try to at least capture from a shaded image.
Sunrise and sunset are always great times to take pictures. The colors can help make an image really stand out. Some clouds help this even further and can make for some dynamic images. Just be careful not to get stuck out in a bad storm or rainfall. (But also, if you can, and you still have a dry camera, and the storm has lifted, try to get back out there. Landscape photos always look epic after a storm. Something about the clouds and lighting always makes them stand out)
Oftentimes, I’ll drive out to the Blue Ridge Parkway on a Friday evening, and take sunset pictures at a spot called Raven’s Roost. Then camp somewhere along the Appalachian Trail, just to be up early enough to catch the sunrise at the next spot. This gives me two chances to capture a great image, especially if one gets rained out.
Be Patient
Some of the best hiking photography requires patience. If you see a scene that you want to capture, but there’s too much light or the wind is blowing, wait it out. The conditions might eventually change and you’ll be able to get the shot you want. Especially during cloudy days when you’ve already got a few shots but really want the sun to pop out.
Use A Tripod
This isn’t necessary, but it can be super helpful. Especially if you’re practicing patience per the above tip. This way, once you already have the image composed, the tripod holds it in place until the right moment.
Tripods also help improve images taken when there isn’t much available light, by allowing your camera to slow the shutter speed and not produce blurry images. And if you want to get fancy, you can even use the tripod to capture some long-exposure images.
I use my Peak Design travel tripod a bunch. It’s lightweight, and easy to set up, and breakdown.
Invest In A Polarizing Lens Filter
This is a totally optional piece of gear, but one that can help improve your hiking photography. It’s generally a screw-on filter that helps reduce glare and can produce more saturated colors. You can find them pretty cheap.
For full-sized cameras & lenses, just make sure to match up your lens’s circular size. It’ll likely be listed on the front of your lens. Could be 37mm, 56mm, 72mm, or various other sizes.
Additional Questions:
How do you carry a camera while hiking?
You can carry your camera in a couple of different ways. There are numerous different holsters, straps, connectors, or even backpacks specifically made for carrying cameras.
I tend to go the cheapest route, although not necessarily the safest for my gear. But that’s simply storing my camera in my hiking bag. I might use some extra clothing or a jacket to act as a cushion should I accidentally fall or drop my bag in a bad place.
Then when I decide I want to take pictures, I’ll unpack it and hand carry it as needed. Peak Design makes a pretty cool device called the Capture camera clip. This lets you clip your camera to one of your backpack straps so the camera can be easily grabbed for that next picture.
Another method allowing you to keep your normal hiking bag would be to get one of Hyperlite Mountain Gear’s Camera Pods. It attaches to your backpack straps and rests on your chest. A huge difference between this and the above-mentioned Peak Design Capture is that the camera pod can actually provide protection for your camera should you fall or get caught out in the rain without having to stash the camera back into your bag.
If you’re up for investing in a whole new backpack specifically to carry your camera gear and hiking you can start looking at brands like Moment & Lowepro. They can be a little expensive, but your gear will be better protected than simply using your normal hiking backpack.
How do I take good hiking pictures with my iPhone or Android?
Most of the above tips ring true even for iPhone or Android users. For those up-close detailed shots, use your phone’s Portrait mode. While for the not-so-close details shots, maybe try pano or a wider angle.
When taking pictures of contrasty scenes like sunrise/sunsets or mountain scenes with bright skies, try using the phone’s Night mode. This may help remove some of the shadows in the image so you can see all the details.
Regarding the tripods and polarizing filters, just be sure to purchase the applicable model for your phone. I like the Joby brand tripods. High quality and bendy so you can set them up in a bunch of different positions. While Sandmarc is a solid brand of polarizing filters for iPhones. Although there don’t seem to be many options for Android phones.