Mastering beach night photography is a dream for many photographers! Beginners find it challenging because it tests their creative and technical skills until they figure out how to make the environment work in their favor. Besides knowing your equipment and camera settings, your patience also determines the quality and visual impact of your beach pictures.
While day shoots are fun, with beachgoers in the sun enjoying spectacular ocean views, night photography is more of a personal experience. You can experiment with your camera settings and learn the art of waiting for the best shots.

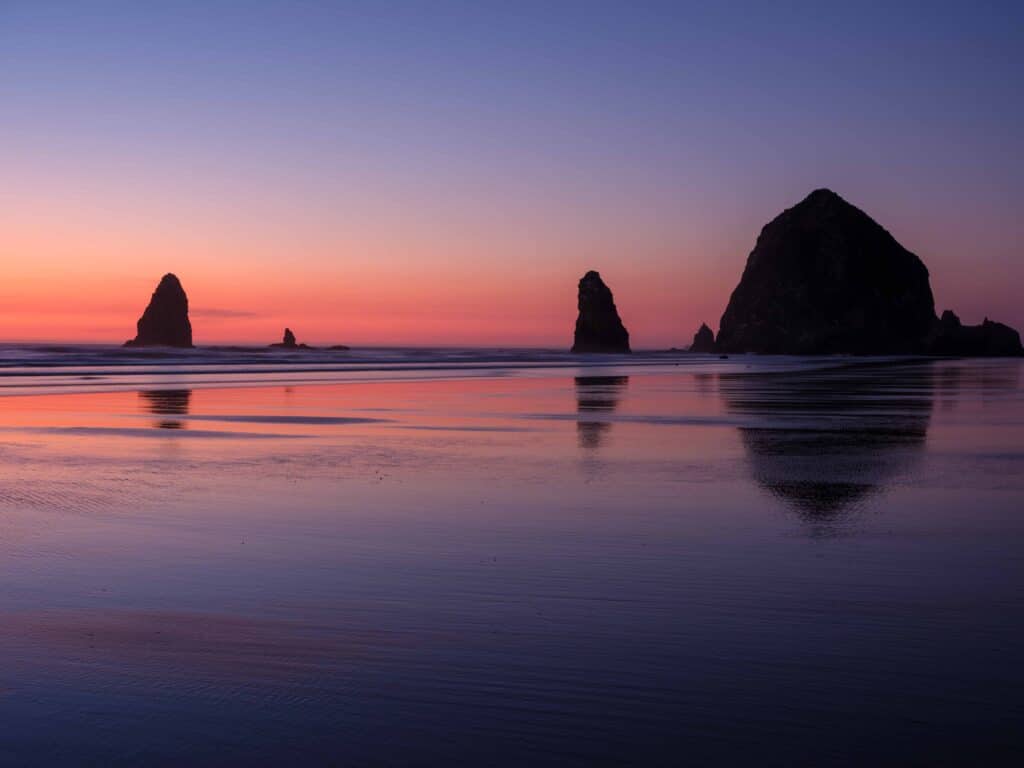
How Is Beach Night Photography Different from Day Shoots?
Most photographers set aside time for beach day photography. They capture sunrise and sunset with various compositions and exposure settings. It’s a way for them to practice patience and understand how to environment affects their pictures. However, nighttime on the beach is different.
The waves silently crash against the ocean as if taking a rest after a long day. The night sky is partially bright with industrial lights, and the sand has little to no footprints marking someone’s presence. Capturing this calm and peaceful scenery is a challenging yet exciting opportunity for new photographers! If you have the right equipment and know your camera settings, you will capture the best beach pictures for your portfolio.
Equipment for Spectacular Shots
Camera with Full Manual Mode
Your camera should have a full manual mode to customize the settings for beach night photography. Once you stand in front of the ocean, you’ll be able to observe the environment properly. You never know which camera setting will work best until you have identified your light sources. Therefore, having a camera that gives you complete control is crucial for beach photography.
Tripod
When you have a limited number of light sources, you need to use a long exposure to capture the beauty of the ocean and the night sky. If you take your camera’s weight yourself, the pictures will blur. So, grab a tripod before you go on your night trip to the beach. The tripod should be sturdy enough not to move with the onshore wind.
Wide Angle Lens
A wide-angle lens is best for night photography as it creates a perspective distortion and captures the ocean waves in a dramatic shot (if that’s what you are going for!). Photographers use a wide-angle lens to increase the horizontal scope of their photos. The farther objects appear distant, while the things closer to the camera look more prominent, making them perfect for beach photography.
Remote Trigger and Cable Release
This one is up to you! If you are confident that a sturdy tripod is enough for stable shots, you do not need a remote trigger or a cable release. However, if you think you may end up shaking the camera and missing your perfect moment, use one of these two pieces of equipment to avoid unnecessary interruptions.
Camera Settings to Capture the Calm of the Ocean
Nighttime can be challenging for new photographers because of the limited help from the surroundings. When the ocean waves are calm and no soul is in sight, the following camera setting will help you capture the best shots for beach night photography:

Aperture
The aperture is responsible for the light entering the lens. For night photography, a low aperture is better as it lightens up your shot without compromising the quality of your picture. You can have photos with low noise with low apertures like f/5.6, f/3.5, or f/2.8. Some lenses have better aperture settings than others. So, change your settings based on the lens you have.
New photographers are tempted to use a higher aperture, but it won’t be a wise choice for beach photography at night. A higher aperture makes the image darker, so the night shot won’t be worth it.
Shutter Speed
Night photography is different for every beach because of the light sources. If you are at a beach with more industrial light, you may need to adjust your shutter speed to accommodate the surrounding sources. On the other hand, if the light from your surroundings is low, you can keep the shutter speed to 10 seconds.
10” shutter speed is a decent start for a beginner. Eventually, you will learn that 10 seconds is nothing compared to what expert photographers use for their night photographs. Some even use exposure for 30 minutes to capture one perfect photo!
ISO
ISO settings are associated with the aperture and shutter speed. If you increase your ISO, the image will be brighter and more noisy. If you have a good camera, you can take a clean and exposed shot at 1600 ISO. Some photographers go for 100 or 200 ISO because it keeps the image sharp with low noise.
Again, the surrounding light sources can help determine the ISO settings. Noise makes images look grainy. When you capture the ocean waves and the almost dark night sky, a grainy image will ruin the shot. It’s a decision you can make based on the kind of photo you want to capture.
White Balance
Nighttime at the beach has light sources that do not catch our eye at first, but when we take a few photos, we can notice how they brighten up our images. Therefore, keeping the White Balance to auto will protect your images from unnecessary exposure. Auto White Balance is the middle ground to help you during the editing process.
Taking a Picture
Beach night photography is all about experimentation! You can use our camera settings as a benchmark and change your own settings depending on the scene you have set. The best way to know if your settings are working is to take a few shots and observe how the light affects your composition.
If you find the photo darker than you wanted, you can adjust the shutter speed to 30 seconds. If it still comes out dark, you can increase the ISO and risk getting grainy images. Playing with the aperture settings will help you keep the ISO low and avoid noise in your photos.
Wrapping Up
The calm beach at night with crashing waves, soft sand, and chilly breeze can inspire anyone to capture that moment for eternity. All photographers have the power to share this experience with people who are unaware of the beauty that the beach holds at night. If you thought before that beach night photography is difficult, we hope it doesn’t seem that way anymore!
Related Articles
These 13 Beach Photography Prints Will Make Your Room Feel Cozy