As both a hiker and photographer, I feel it offers me a pretty good opportunity to catch some epic shots. Most of my hiking gear is pretty lightweight, same can be said for most of my cameras. Yes, there are a few things I’ll be without, but it works for me, use it as a tool. Without further ado, check out my minimalist hiking and backpacking gear guide for photographers!
“I am a participant in the Amazon Services LLC Associates Program, an affiliate advertising program designed to provide a means for me to earn fees by linking to Amazon.com and affiliated sites. Full disclosure here.”
Cameras
There are so many different options out there. And with cameras going mirrorless, it’s a whole lot easier to find a lightweight and small setup. Don’t get me wrong, you can go lightweight with a mirrored camera, aka DSLR camera system, but if you’re on the hunt for a new camera to hike with you’re better off jumping into the digital systems.
All the big brands make mirrorless systems these days, and overall you really can’t go wrong with any of them. You got Fujifilm, Sony, Nikon, Canon, and Lumix. There are a few budget-friendly options under $1000, like Fujifilm’s X-T200 or Sony’s A6000. As you may already know, I am a huge Fujifilm guy because of their image colors and the physical feel/features of the cameras.
Sony makes a great mirrorless system and is really popular. Nikon and Canon were a little late to the game, but they’ve put out great products as well. And as I mentioned earlier, you can’t really go wrong with any of the big brands.
Overall, digital cameras do have their own set of pros & cons. Pros, of course, are lighter-weight, small form factor, and great focusing systems. While cons are battery life and maybe feeling if you’re an older school DLSR user. Battery life has gotten better over the last couple of years though.
For this article, I’m going to focus on my favorite camera brand, Fujifilm. Here are two of my favorite cameras from their line-up that are great for backpacking, the Fujifilm X100V, and the Fujifilm XT4.
Fujifilm X100V
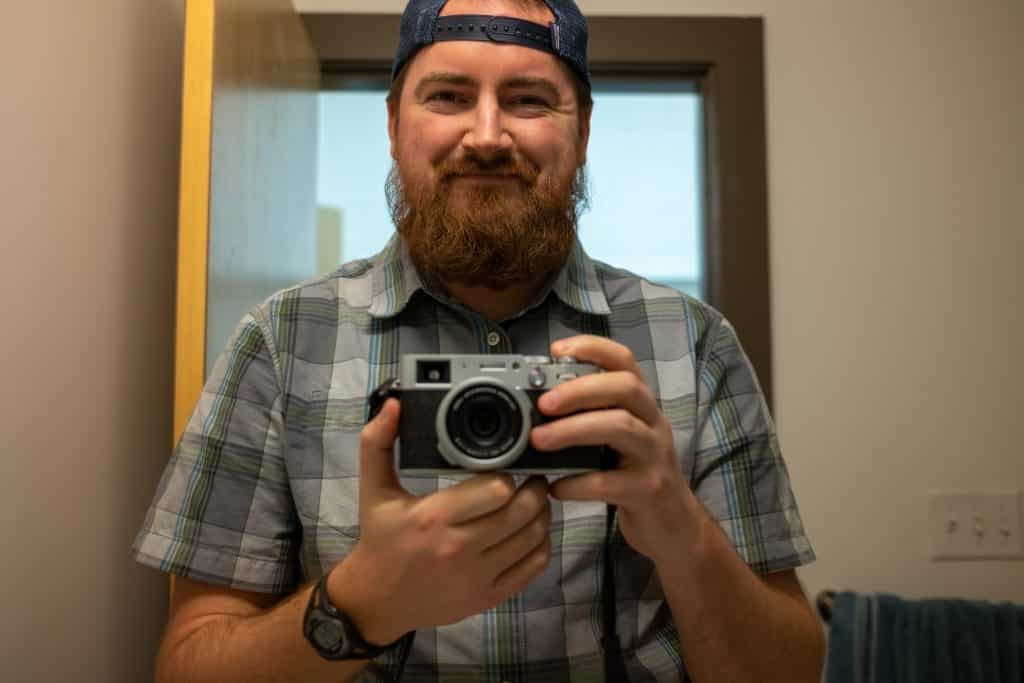
Although more of a point & shoot camera instead of a mirrorless system, it still takes high-quality images in a really small form factor. It has an awesome built-in lens so you also won’t have to worry about carrying another lens during the hike. A trade-off though, is that the lens is fixed at one focal length. Which is something I love but I can see some people wishing to have the ability to zoom in. It’s about a 35mm focal length, which is perfect for street photography, travel & general everyday focal length. You can buy lens converters to make it go wider or longer but that adds to the form factor and makes for a larger camera setup.
The X100 series of Fujifilm also has a built-in ND filter, which comes in handy while traveling/hiking if taking pictures in broad daylight or you want to do some long exposure work. You don’t have to carry a separate filter or filter system, you can just push a button on the camera, and viola!
One thing to keep in mind with this camera is that it’s not weatherproof. Although it’s a well-built camera and has gone through an accidental drizzle or two with me, it’s back in a waterproof bag/pack at the first sight of a storm or rain.
I personally shoot with the Fujifilm X100F, which is the version before the X100V but they are really similar cameras. The X100V added a flip-out LCD screen, sharper images at lower aperture numbers, and a few other things. But it wasn’t enough of a difference for me to consider upgrading.
You should be able to find the X100F on sale, while the X100V model will be at full price. Check them both out below.
Fujifilm XT4

Next is Fujifilm’s flagship system, their mirrorless beast of a camera, the Fujifilm XT4. It shoots great photos but also great video, in a relatively small package.
It’s a classic mirrorless camera, so you can change the lens, going with a zoom lens or prime. For travel though, it’s best to stick with prime lenses, as they’re smaller and lighter weight.
Fujifilm has a bunch of great prime lenses for travel, that are all decently priced. They even make a weather-resistant lens, if you’re often hiking/camping in wet conditions, that could prove really beneficial.
I would say pick two different lenses, each with its own specific reason. Maybe one for wide landscape shots that are waterproof, while the other takes great portrait shots with a low aperture.
I’ll go into more detail below. Here’s the lens I recommend getting for the XT4:
- Fujifilm 16mm f/1.4 – High-end, strong bokeh, weather-resistant lens for wide-angle shots. (Budget version with lower f/stop)
- Fujifilm 23mm f/1.4 – Strong bokeh, street/everyday walk-around (Weather resistant version with lower f/stop)
- Fujifilm 35mm f/1.4 – Strong bokeh, street/everyday walk-around, a little more reach than the 23mm lens & great price (Weather resistant version with lower f/stop)
Or just grab one for now and make it work. Can’t go wrong with any of these lenses. They’re all super high-quality lenses.
The older modeled Fujifilm XT3 is also still pretty popular. And might be found at a pretty decent price. You can’t go wrong with either.
Photography Accessories
Along with carrying your camera/lens, here are a few accessories that you may find helpful while out for a few days in the woods.
- Extra Battery/SD Card Carrier
- Small, budget-friendly, super lightweight tripod or expensive carbon fiber lightweight classic tripod.
- Peak Design clip for carrying your camera on one of your backpack straps
- Or one of their many straps. I use the Peak Design Leash as my strap for mirrorless cameras or the Peak Design Cuff for a handheld strap.
- One of these waterproof camera bags from B&H. I use a kayaking dry bag, but you may want something more specific for your camera.
- I always carry a headlamp with me when hiking/camping for obvious reasons but it can also be used to light paint. Which can create some unique shots after the sun sets.
Minimalist Hiking And Backpacking Gear
Now that I’ve gone through the lightweight cameras, it’s time to go through the hiking and backpacking gear. I’ve broken it down into a handful of categories. And will add or tweak this list as I get more gear that applies here.
Backpack

I currently use the Osprey Talon 33L for most of my adventures. Because most of the gear I have is pretty lightweight, I find this to be a perfect size. Its sweet spot is a weekend trip, but anytime I need more than 3 days worth of food in my backpack I’ll change it up. The pack does have some age too, but it still does me really well. I’m eyeballing a Hyperlite Bag next, but those things can be expensive.
Tent
Big Agnes tents would be a good place to start. I use the Big Agnes Fly Creek 1 man tent. It’s a great system for those that wouldn’t mind a front entry tent. Getting in the tent can be a little bit of a headache but otherwise, it’s a very lightweight tent and suits my needs with minimal gear. It packs down pretty small and is easy to set up.

My roommate has the Big Agnes Copper Spur 1 man tent, and although the Fly Creek is a tad lighter, I’m jealous of his because it is a side entry tent. Side entry tents are generally easier to get into and can offer a little more vestibule space.
Sleeping Bag
I currently use a Montbell 40-degree down sleeping bag as my primary three-season bag. It’s super lightweight and super packable. And although it’s a mummy bag, this specific bag has a built-in stretch so it’s not as restrictive as other mummy bags can be.
One of the next things on my list is to also get a lighter-weight winter sleeping bag, but because I don’t camp in the winter much, it’s lower on my list.
Sleeping Pad
The two most popular types of lightweight sleeping pads are closed-cell and inflatable sleeping pads. They each have their own pros and cons. Depending on which one you choose and the quality of the model, it can cut weight and/or save space in your pack.
Closed Cell Sleeping Pad

For multi-day trips where I want to be really lightweight, I’ll pack my Nemo Switchback. Which is an accordion-style, closed-cell sleeping pad. It’s light, quick to set up, can’t pop, and makes a great cushion if sitting on rocks for a snack/lunch.
Sleeping-wise, It might not be the most comfortable pad in the world, especially for side-sleepers. But it’s enough when you’re concerned about pack weight. Another downside to this kind of sleeping pad is that it can only fit on the outside of your pack. Sometimes I keep mine strapped to the bottom, but if it rains and I need to put my pack cover on, I shift it to the back of the backpack so the pack cover fits.
Another popular closed-cell sleeping pad is the Thermo-Rest Z-lite. I used this one for many years before it started to lose the cushioning that it had. I’ve noticed the Nemo Switchback packs down a little bit more and feels like it has a little more cushion than what I remember with the Z-lite. But I also purchased that about 8 years ago, so my comparison might be a little off. When it comes down to it, either brand works and are both really popular, so you can’t go wrong with either one.
Inflatable Sleeping Pad
I only recently got into the world of inflatable sleeping pads. Figured since I am a side sleeper, it makes the most sense to at least have that option. With inflatable sleeping pads, fit in the pack, can be lightweight, and are definitely more comfortable than the pads mentioned above.
But the main trade-offs are price and the possibility of the pad popping or losing air. Most come with repair kits, but it’ll still be rough in the middle of the night going through that. If you want a really lightweight and small packing inflatable sleeping pad, you’re looking at spending $130-$200 vs $40 for the closed cell pads. They can also be pretty noisy depending on the make & model.

I use the Nemo Tensor Insulated Mummy version, which is super comfortable. It was pretty noisy the first couple of times I took it out but has since quieted down. The insulated part can be a little hot in the summer but I got this with fall/cooler weather hiking in mind so no regrets there. One thing I do wish I had done though, was to get the wide version instead of the mummy version. When sleeping on my back and because of the pad height, my elbows fall off the pad. It can be annoying and uncomfortable. But I’ll generally sleep like a vampire to solve that issue. (kind of joking, but really, that’s what I do)
Footwear
This is where it gets fun. Because I’m a trail runner I never seem to just have one pair of trail-worthy shoes to take with me. I have a bunch, and each one has its place.
But here’s my first recommendation. And it’s almost too easy to recommend.
Altra Lone Peak 5

I’ve struggled to find a pair of trail running shoes that I really enjoyed for the past 5 or so years. These guys ended the struggle for trail running, while also giving me a great hiking shoe as well. Because they’re trail running, they’re already lighter than most hiking boots and shoes, but these are also considered minimal shoes so they’re even light weight.
The trade-off is that these shoes don’t offer a ton of protection, especially for those not used to minimal shoes. But if you are, these are definitely well worth it. And speaking of minimal shoes, if you love going barefoot a lot of places and want something to give you as much ground feel as possible. Check out the shoes listed below.
Xero Terraflex

These are my everyday shoes and occasionally can be my hiking shoes on day trips. They’re super lightweight, packable, really comfortable, and provide a great ground feel while still offering some protection. But if you’re not familiar with near barefoot shoes and enjoy a lot of protection while hiking, avoid these.
Brooks Cascadia

I wore these a ton before I went into the minimalist world. These are still trail running shoes but they’re the tanks of the trail running world. A bunch of protection, and great cushioning, and still relatively lightweight considering the protection they offer. They’re also still lighter than most hiking shoes.
Boots
If you still really want a complete boot for hiking while still being minimalist. Check out Lem’s Boulder Boot. It’s lightweight, zero drop that offers the stability of a normal hiking boot. They don’t have the best grip in the world, but they’re super comfortable and can pack down really well. They also look pretty damn sweet.
Clothes
I’m not going to go super in detail with clothes, because clothes themselves can only be so lightweight. It’s more about being selective and taking as little as needed.
One item, I’ll definitely recommend though, is a down jacket. They’re super lightweight, compressible, and warm!
I like the Mountain Hardware Ghost Whisperer 2. It’s one of the more popular lightweight down jackets. It might not be the warmest of all down jackets, but it makes up for its packability.

I got the one with the hood on it for extra warmth at camp or maybe in my sleeping bag when needed. But it can be noisy at times so I don’t use it much. Probably would’ve been better off with the hood-less model. It layers under jackets better and packs down a little bit less. It all comes down to your preference.
In the summertime & warmer months, for my lower half, I normally bring two or three of these Patagonia shorts. One or two for hiking in the day depending on the trip length and one pair for sleeping.
I’m also a huge fan of Smartwool merino wool products for just about everything, including t-shirts, base layers, and hiking socks. But nothing beats my primary socks, Injinji toe socks! Love those things.
Wrapping Up
Marrying your photography gear and hiking gear can be a little bit of a challenge, but I hope this article helps narrow down some choices for you. Now get out there, crush some hikes, and get some epic shots!
Related Articles
What are the Best Camera Settings for Action Shots?
How To Make Your Hiking Backpack Lighter To Fit Your Camera Gear
Leave a Reply